git 准备
主: 192.168.43.101
其他节点: 192.168.43.102, 192.168.43.103
安装过程省略 yum install -y git
主节点创建 git 用户
1 | [root@k8s01 ~]# useradd git |
备节点设置免密 登录1
2
3
4
5
6
7
8
9
10
11
12
13
14
15
16
17
18
19
20
21
22
23
24
25
26
27
28
29
30
31
32[root@k8s02 test_git]# ssh-keygen -t rsa -f /root/.ssh/id_rsa -N ''
Generating public/private rsa key pair.
Your identification has been saved in /root/.ssh/id_rsa.
Your public key has been saved in /root/.ssh/id_rsa.pub.
The key fingerprint is:
SHA256:ozomMf9cpuEe0xWbhecz4UDwmPkNlsdw27YuLlnmXVw root@k8s02
The key's randomart image is:
+---[RSA 2048]----+
| ..o . |
| * * o |
| + O B o |
| o & o .E|
| S = * ...|
| o o o o+ o|
| + = + =.... |
| . ++ B o.... |
| o.+* .. |
+----[SHA256]-----+
[root@k8s02 test_git]# cat /root/.ssh/id_rsa.pub
ssh-rsa AAAAB3NzaC1yc2EAAAADAQABAAABAQDn2Q62b5GthMIqnJb0E+N1pd/mhigDpL+t702SHhax HrPvUY3QNC/1nLJFA2OkjYJIKAs5xlxlh8afRfcyMtApOJGqXA1swLSMK97+cH8cQXMjFTlKSoKL6qfi 9l7q0XC56rLBwkXt+9U9JdaD8ruW3fdNn6VC24ocWvYbI/XpFPArB4u9nbgeko+oLFp0q+MBc33Ucp6m krs3Ytsp5kxolgNEUIXz3/sqpKH4LXioMRAtSx3F3MjarZEUmAsH0hDUQBXLV+u3Zyd+4lXZA9ALwz1k 2l/R9p58zyAufR8EvvgWCriZMLeCsZdtRDPwsjFaJ1Qo3HPwKZk08q5ClBTL root@k8s02
[root@k8s02 test_git]# git clone [email protected]:/home/git/repo/app.git
Cloning into 'app'...
warning: You appear to have cloned an empty repository.
[root@k8s02 test_git]# ls -al
total 0
drwxr-xr-x 3 root root 17 Jan 10 01:54 .
dr-xr-x---. 5 root root 215 Jan 10 01:25 ..
drwxr-xr-x 3 root root 18 Jan 10 01:54 app
jenkins 安装
使用 rpm 包方法
jenkins 下载地址 : https://www.jenkins.io/download/
当前使用的 centos 安装方法:
1 | sudo wget -O /etc/yum.repos.d/jenkins.repo https://pkg.jenkins.io/redhat-stable/jenkins.repo # 下载 repo 源 |
查看目录1
2
3
4
5
6
7
8
9
10
11
12
13
14
15
16
17
18
19
20
21
22
23
24
25
26
27
28
29
30[root@k8s01 ~]# rpm -ql jenkins
/etc/init.d/jenkins
/etc/logrotate.d/jenkins
/etc/sysconfig/jenkins
/usr/lib/jenkins
/usr/lib/jenkins/jenkins.war
/usr/sbin/rcjenkins
/var/cache/jenkins
/var/lib/jenkins
/var/log/jenkins
[root@k8s01 ~]# systemctl start jenkins # 启动失败
Job for jenkins.service failed because the control process exited with error code. See "systemctl status jenkins.service" and "journalctl -xe" for details.
[root@k8s01 ~]# systemctl status jenkins.service # 查看信息,是因为 没有 /usr/bin/java 导致
● jenkins.service - LSB: Jenkins Automation Server
Loaded: loaded (/etc/rc.d/init.d/jenkins; bad; vendor preset: disabled)
Active: failed (Result: exit-code) since Sun 2021-01-10 02:36:57 CST; 17s ago
Docs: man:systemd-sysv-generator(8)
Process: 80237 ExecStart=/etc/rc.d/init.d/jenkins start (code=exited, status=1/FAILURE)
Jan 10 02:36:57 k8s01 systemd[1]: Starting LSB: Jenkins Automation Server...
Jan 10 02:36:57 k8s01 runuser[80242]: pam_unix(runuser:session): session opened for user jenkins by (uid=0)
Jan 10 02:36:57 k8s01 jenkins[80237]: Starting Jenkins bash: /usr/bin/java: No such file or directory
Jan 10 02:36:57 k8s01 runuser[80242]: pam_unix(runuser:session): session closed for user jenkins
Jan 10 02:36:57 k8s01 jenkins[80237]: [FAILED]
Jan 10 02:36:57 k8s01 systemd[1]: jenkins.service: control process exited, code=exited status=1
Jan 10 02:36:57 k8s01 systemd[1]: Failed to start LSB: Jenkins Automation Server.
Jan 10 02:36:57 k8s01 systemd[1]: Unit jenkins.service entered failed state.
Jan 10 02:36:57 k8s01 systemd[1]: jenkins.service failed.
需要安装 java
1 | yum install -y java |
jenkins 默认日志路径 /var/log/jenkins/jenkins.log
从此可查看初始密码
默认端口 8080 ,可自行修改 vi /etc/sysconfig/jenkins
使用 jar 包
Jenkins war :http://mirrors.jenkins.io/war-stable/
1 | wget http://mirrors.jenkins.io/war-stable/2.263.1/jenkins.war |
docker 安装
我这里时使用 docker 安装
1 | [root@k8s01 ~]# docker run -u root --rm -d -p 8080:8080 -p 50000:50000 -v jenkins-data:/var/jenkins_home -v /var/run/docker.sock:/var/run/docker.sock --name jenkins jenkinsci/blueocean |
访问 http://192.168.43.101:8080, 选择默认插件快速体验
因为 我的服务器 为 arm 架构,jenkinsci/blueocean 暂时不支持 arm 架构 ,使用官方镜像 docker pull jenkins/jenkins:latest
1 | [root@k8s01 ~]# mkdir jenkins-data |
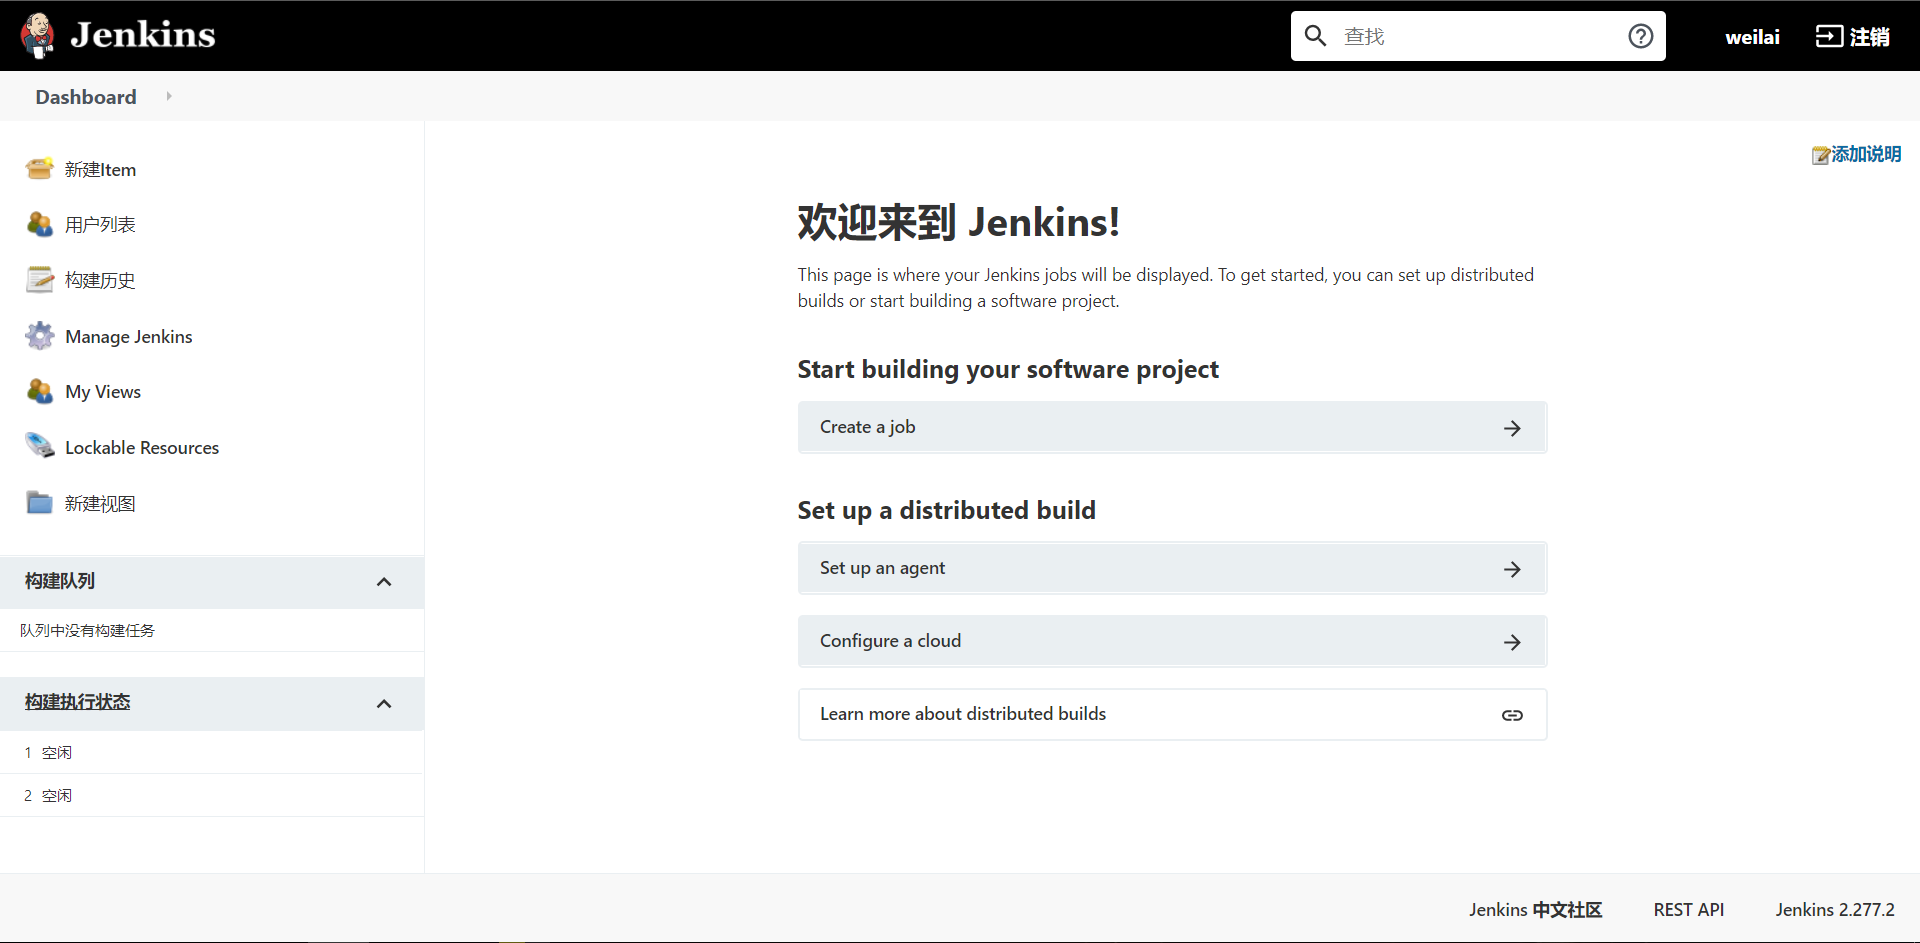
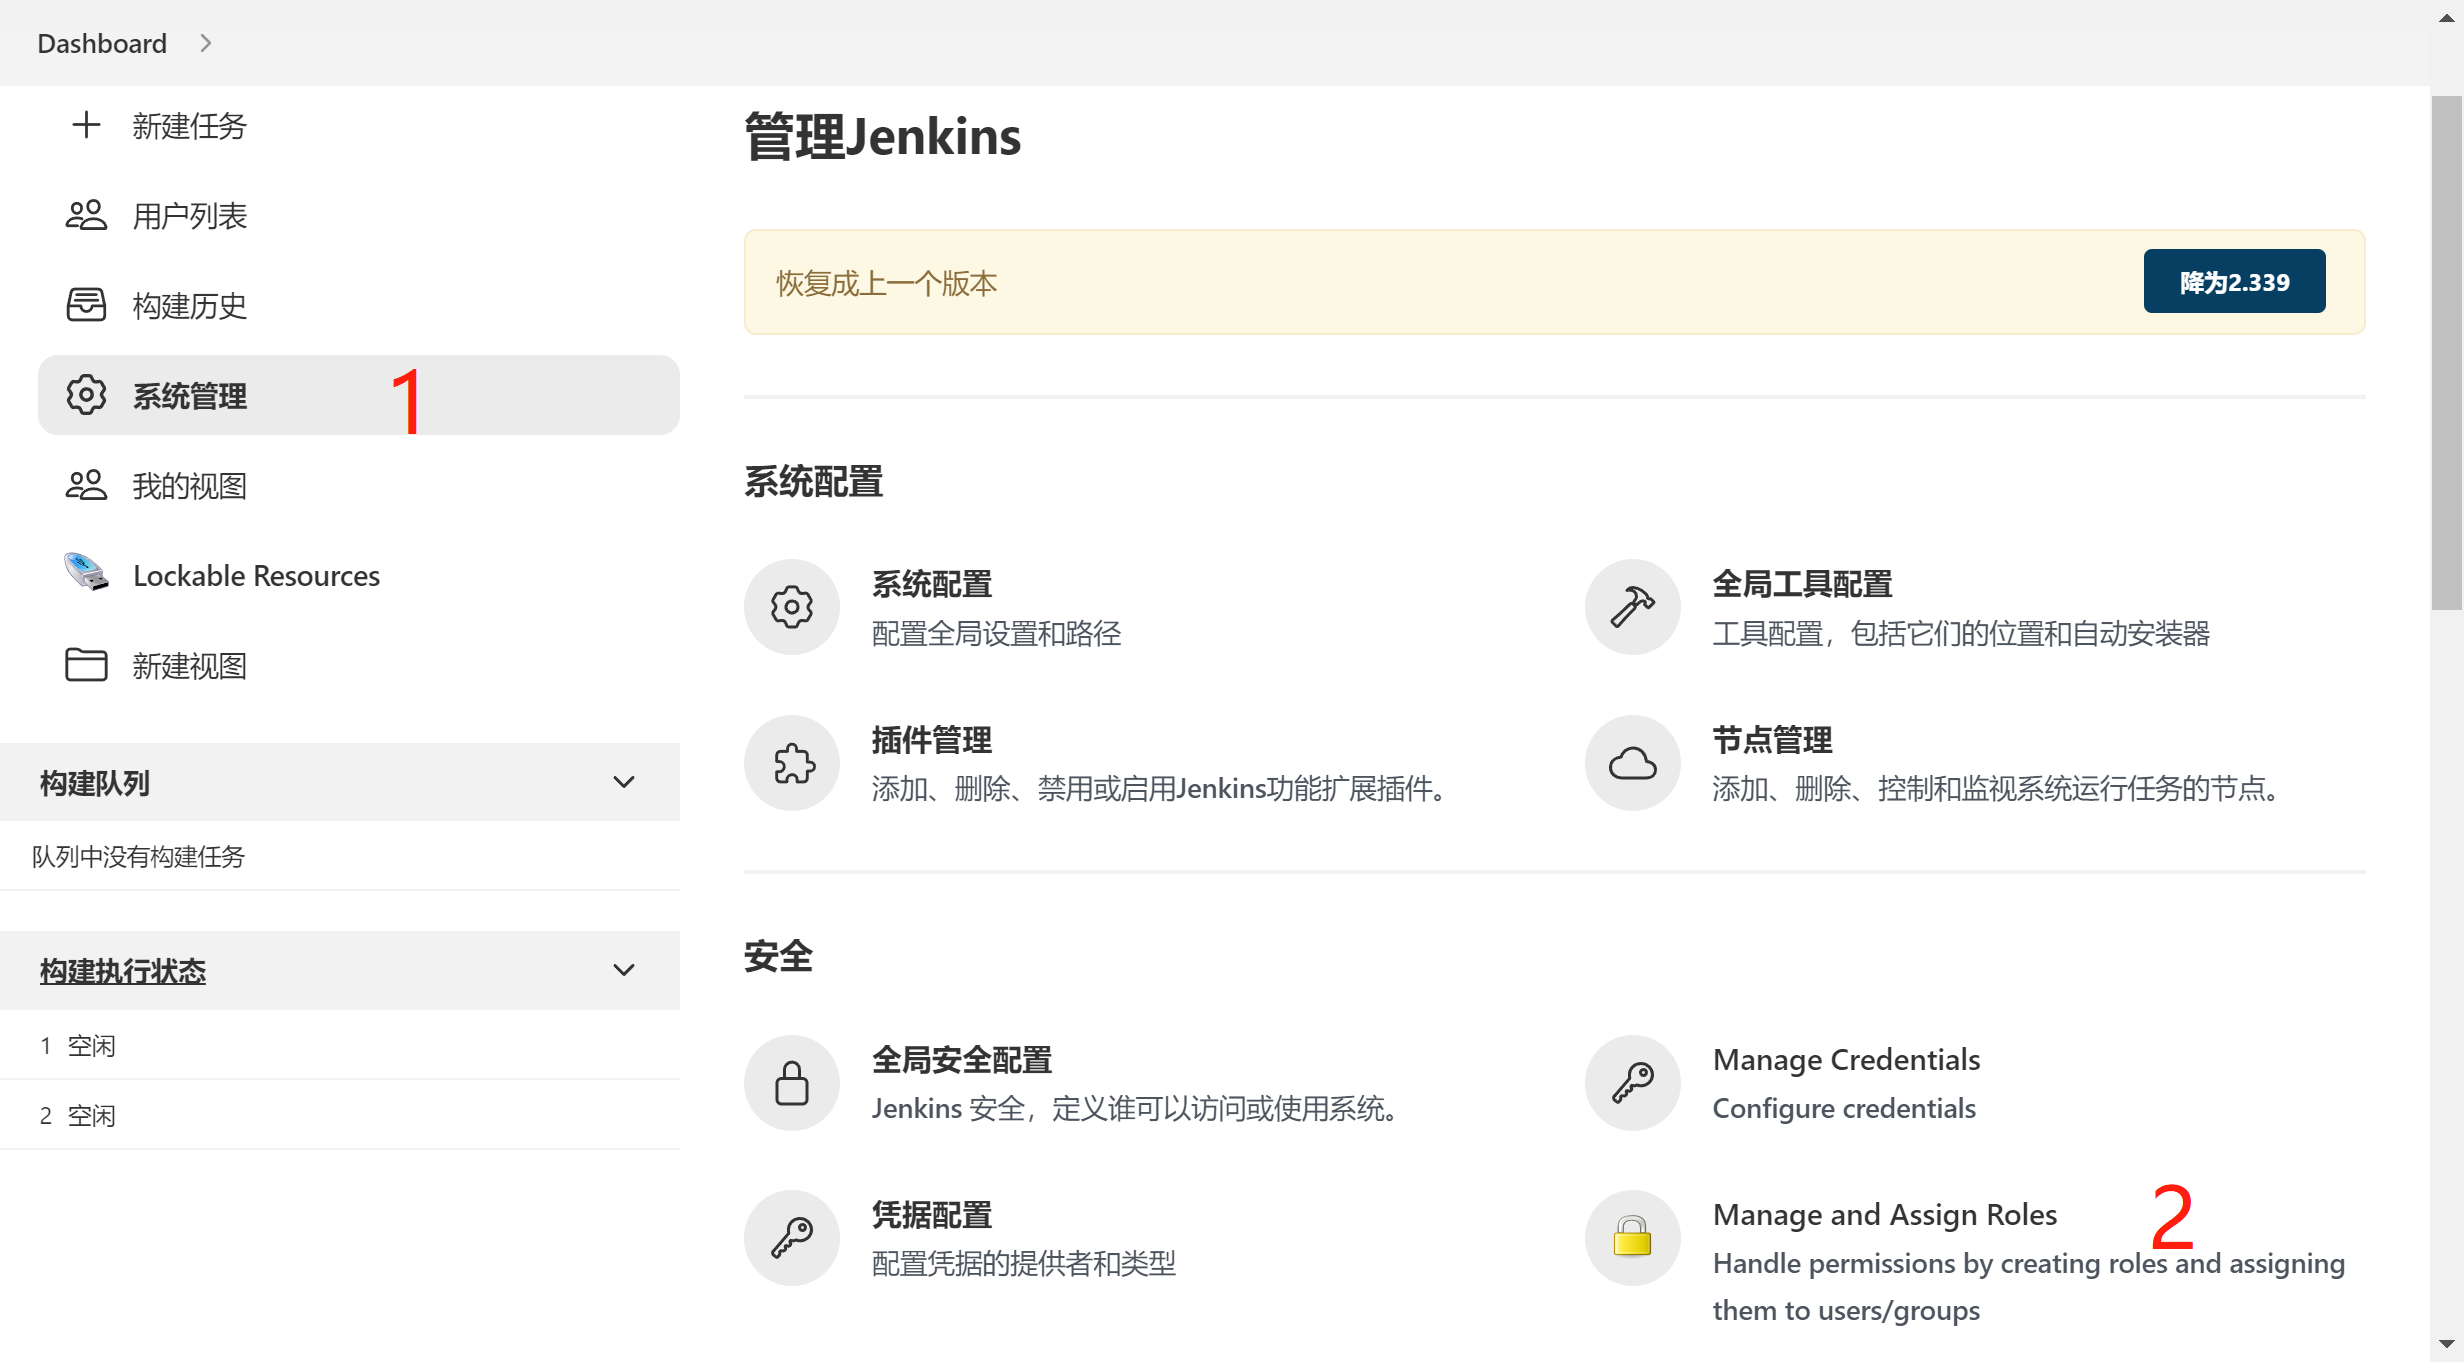
jenkins 简单使用
添加用户以及权限设置
用到的插件 Authorize Project, Role-based Authorization Strategy
如图所示
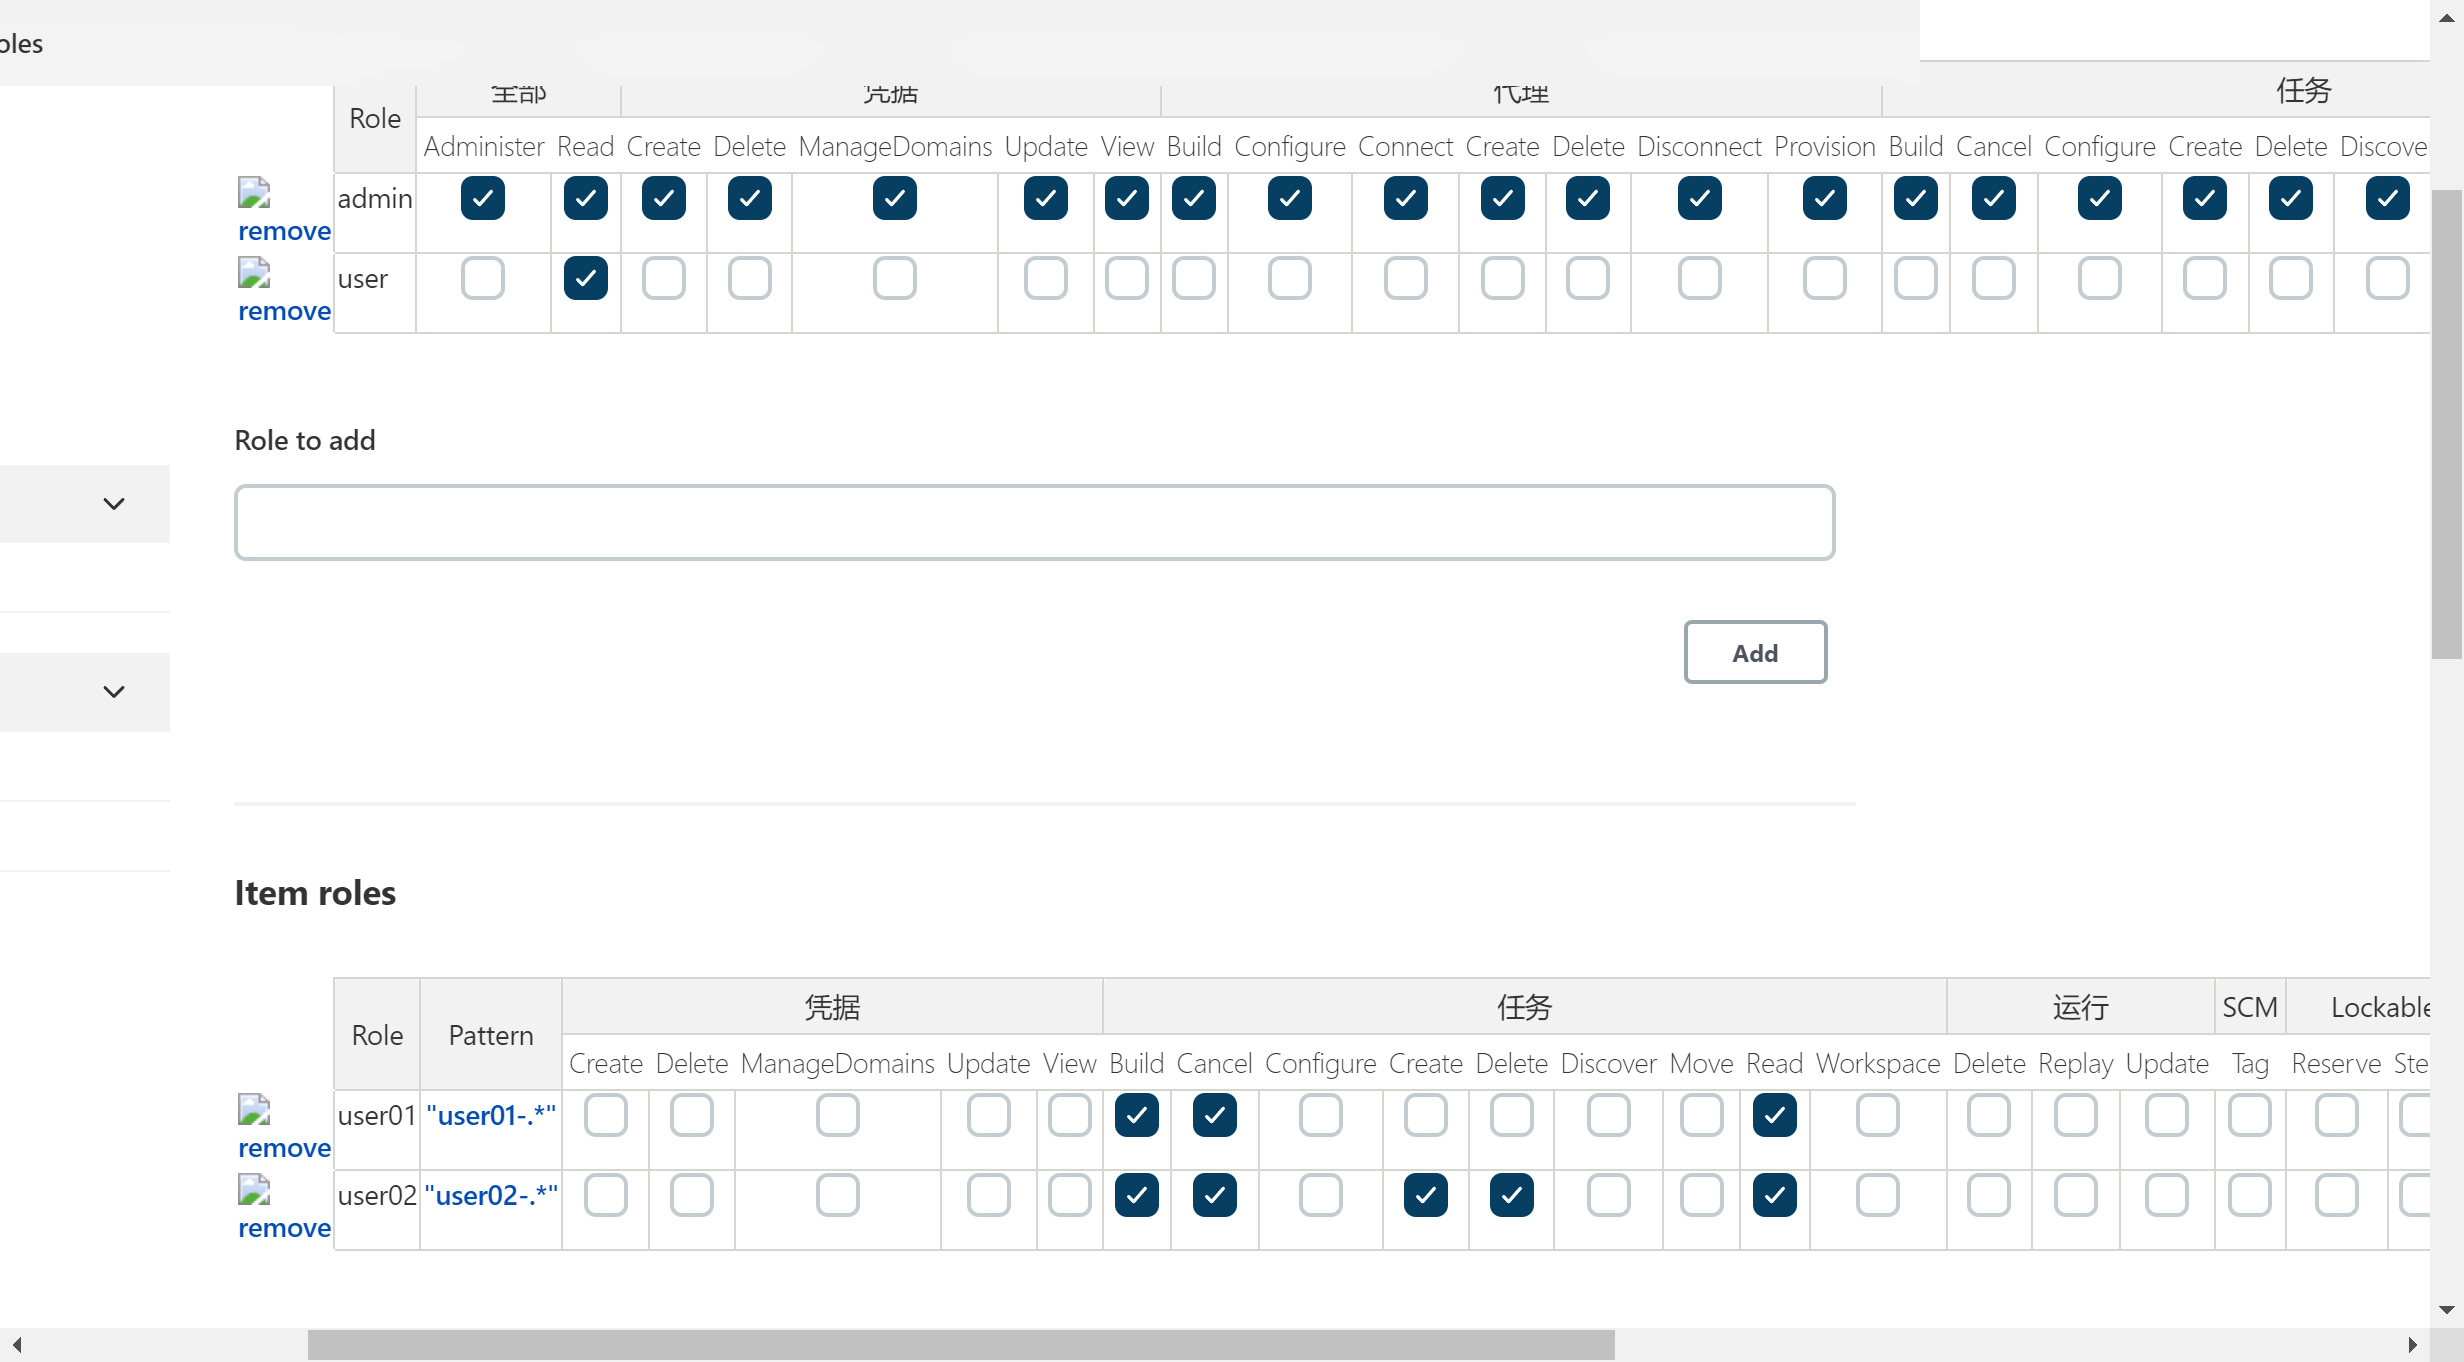
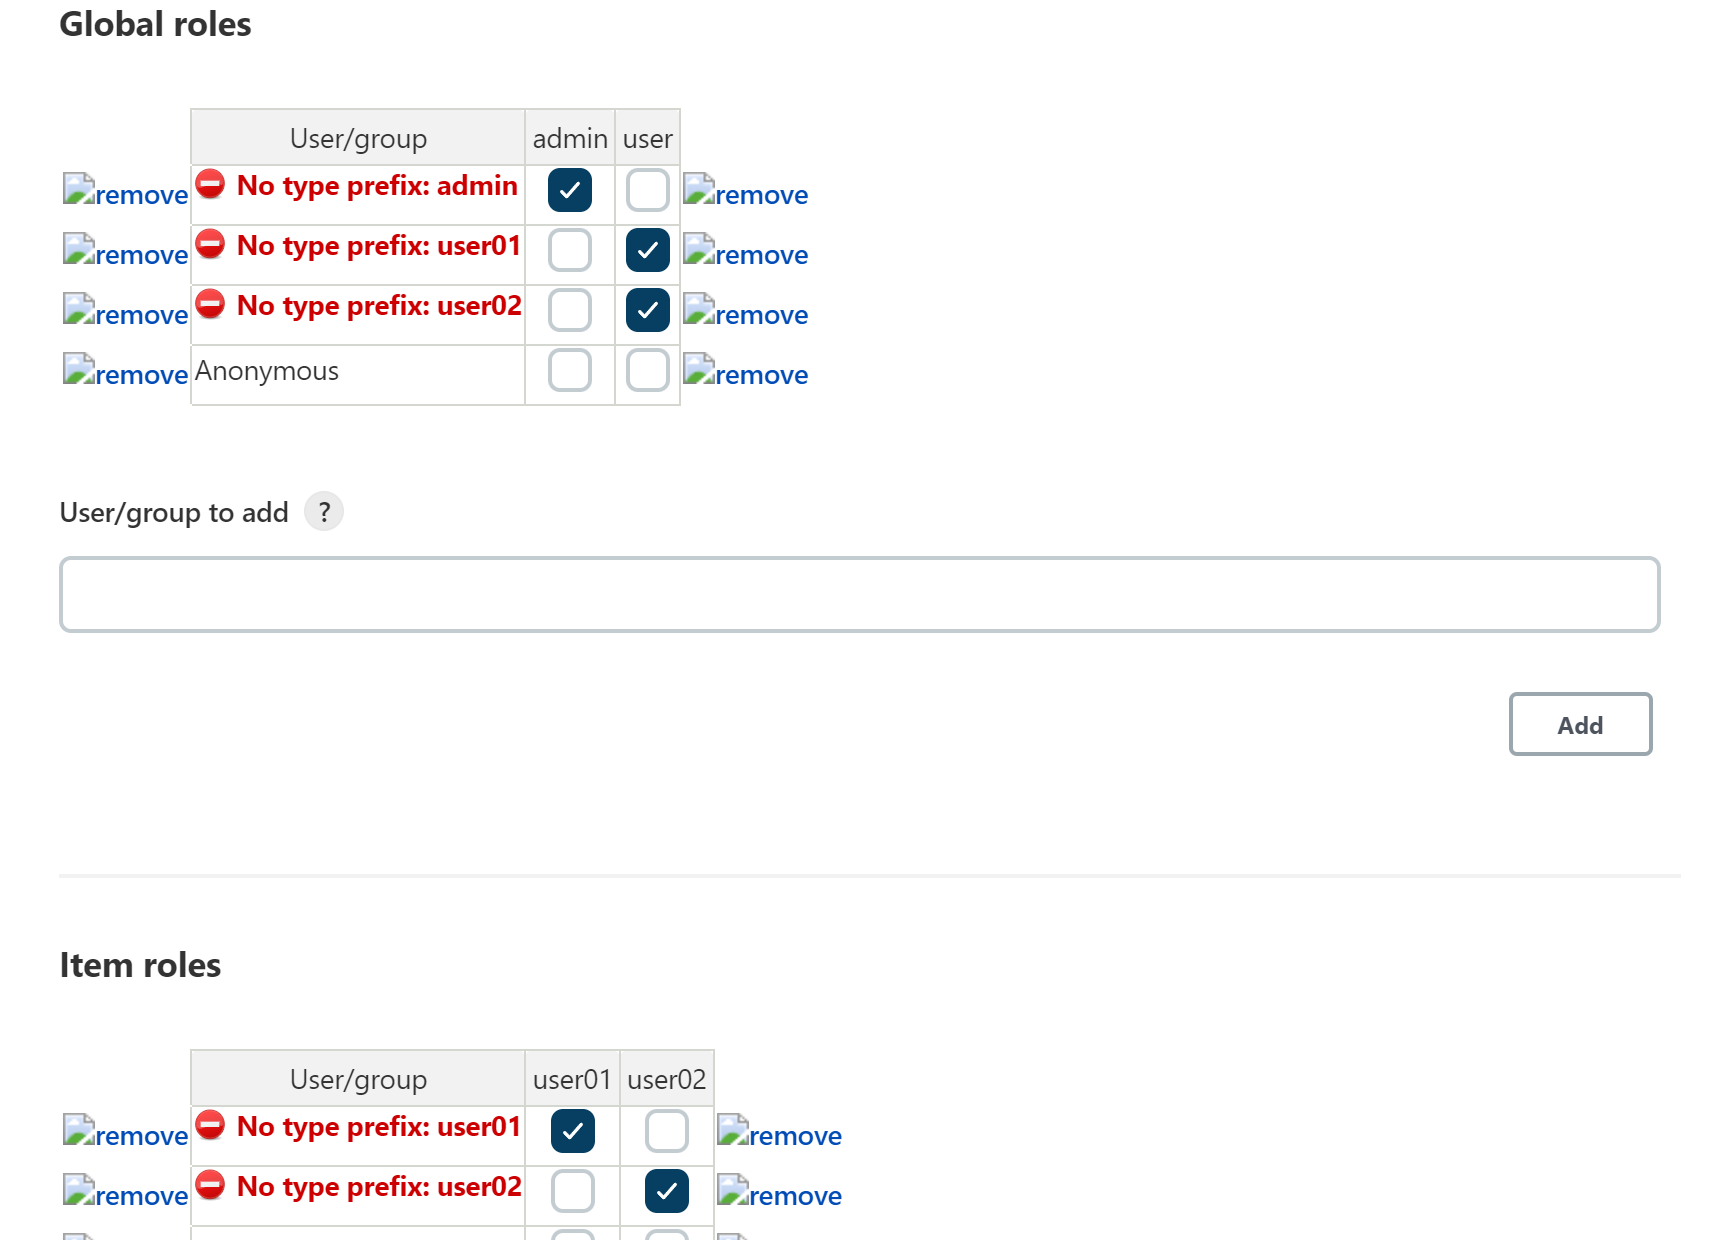
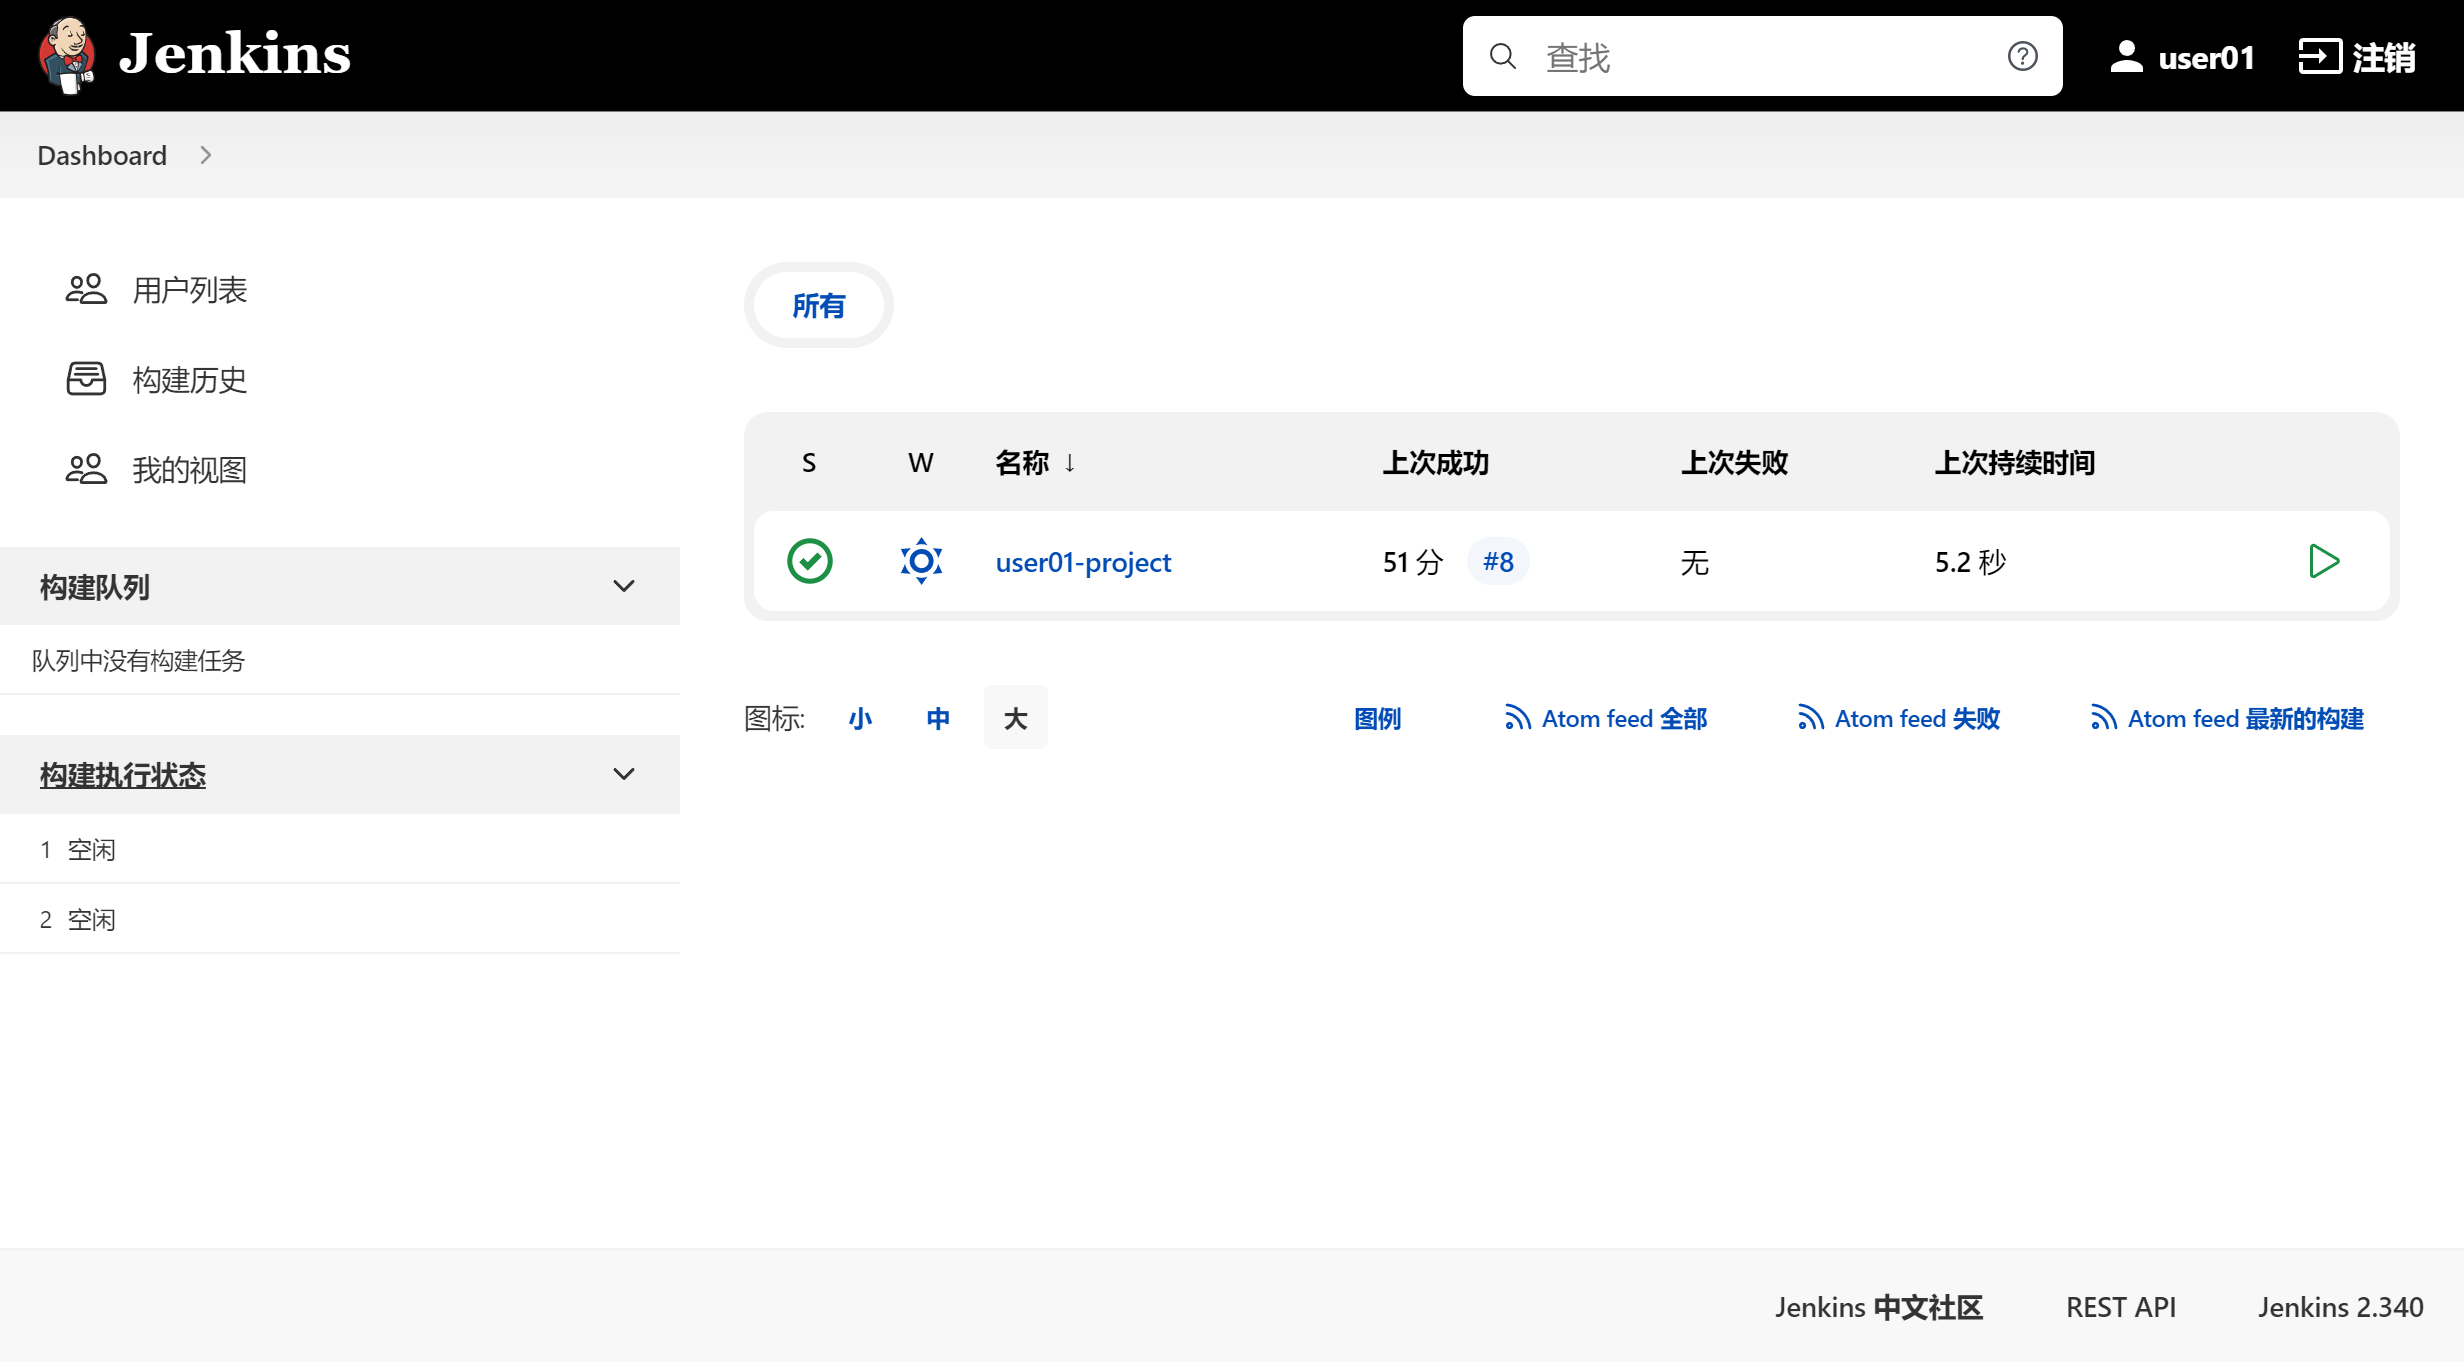
设置完后,用户 user01 在 user01 组,其中 user01 有 user01- 开头项目的权限
设置完后,用户 user02 在 user02 组,其中 user02 有 user02- 开头项目的权限
简单使用
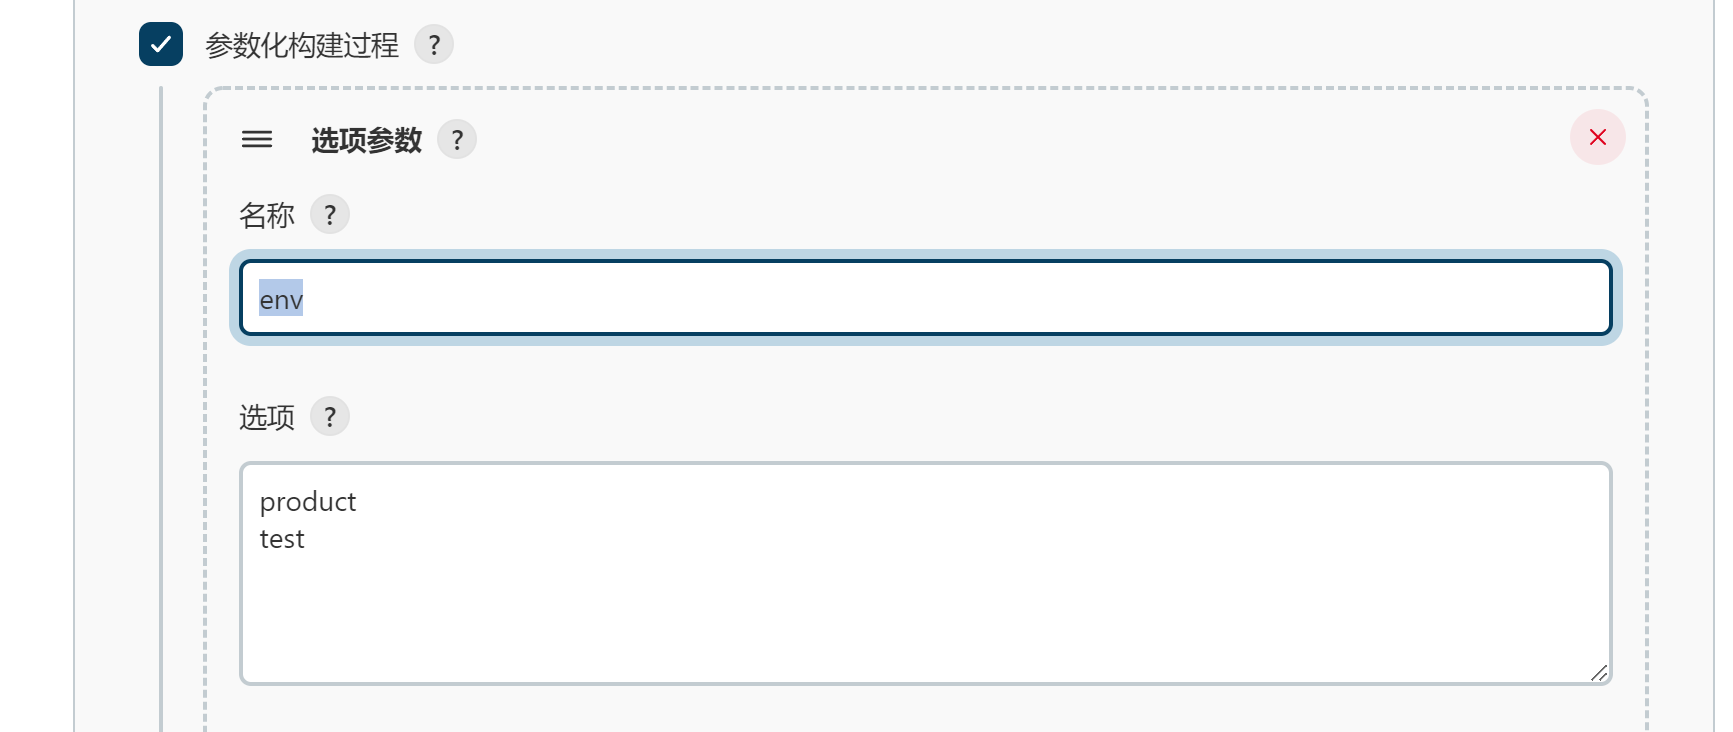
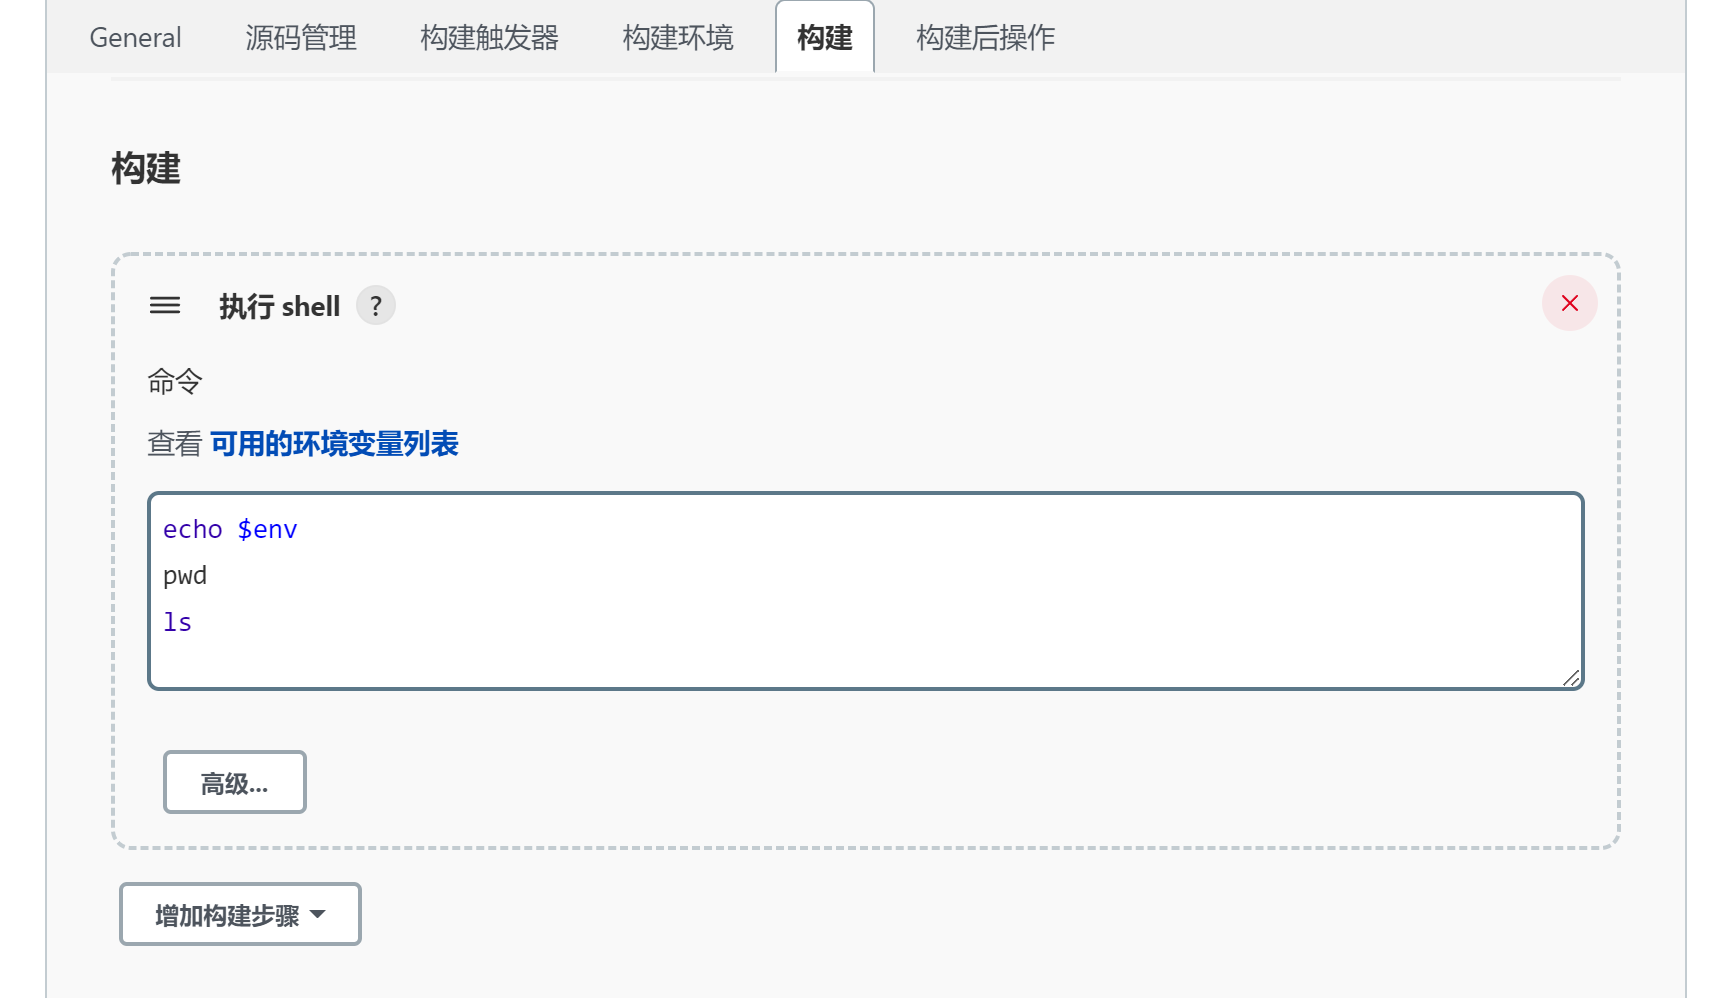
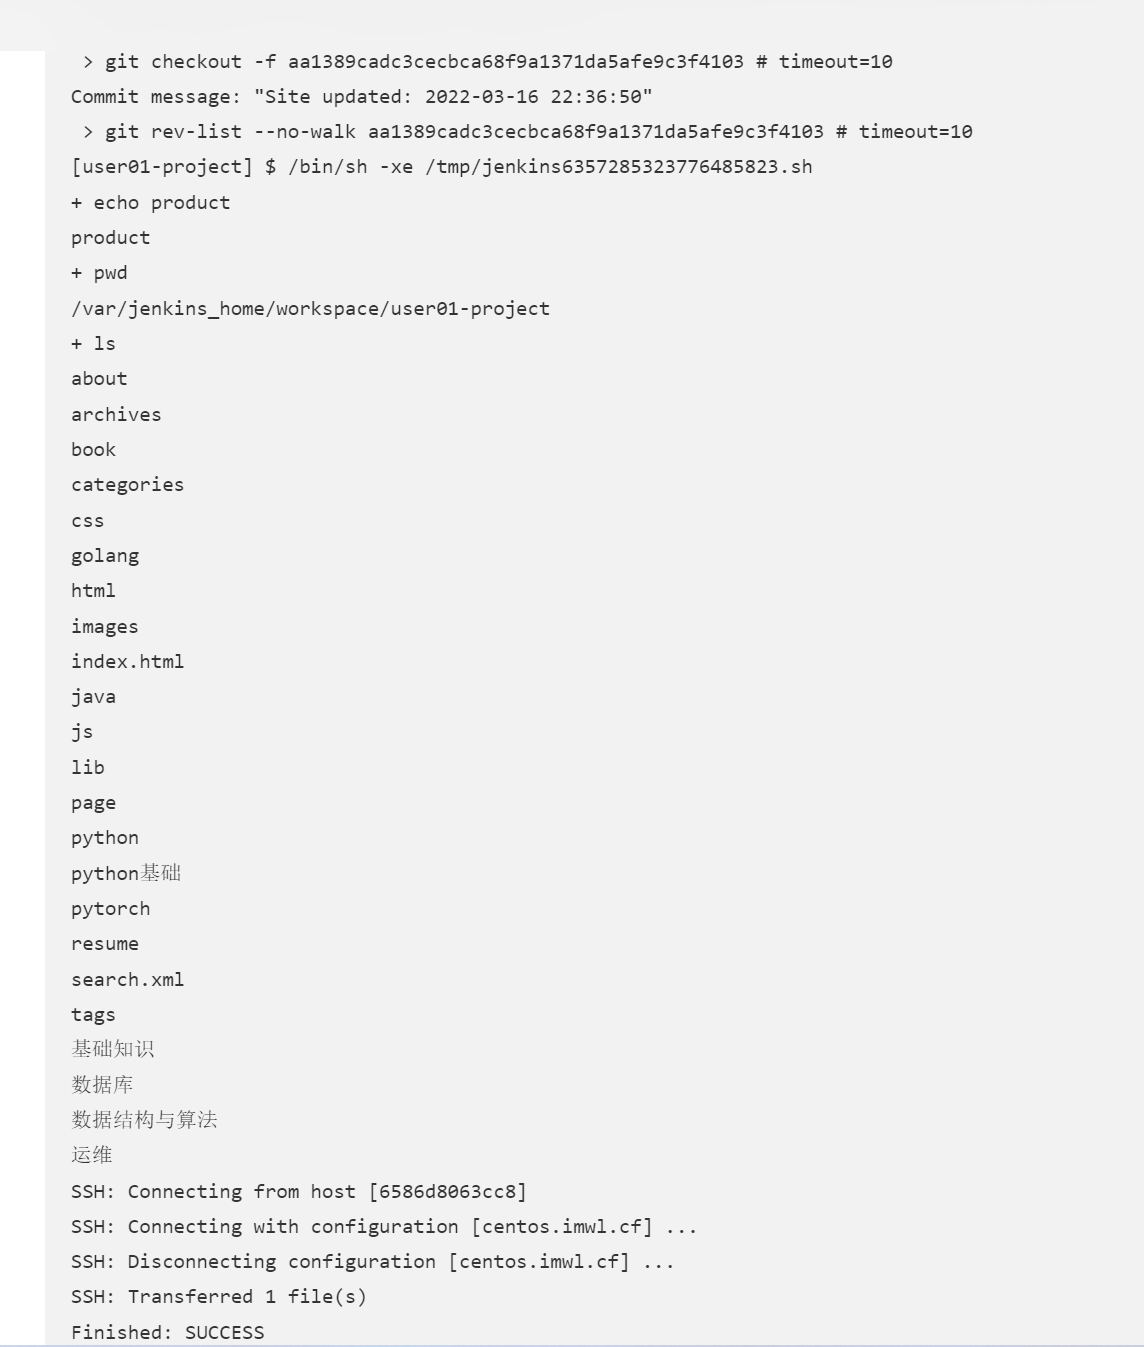
参数化构建