集群开启名叫 DefaultStorageClass 的 Admission Plugin,它就会为 PVC 和 PV 自动添加一个默认的 StorageClass;否则,PVC 的 storageClassName 的值就是’’,这也意味着它只能够跟 storageClassName 也是’’的 PV 进行绑定。
PVC:Pod想要使用的持久化存储的属性,比如存储的大小、读写权限等。PV: 一个具体的Volume的属性,比如Volume的类型、挂载目录、远程存储服务器地址等。StorageClass: 充当PV的模板。并且,只有同属于一个StorageClass的PV和PVC,才可以绑定在一起。也可以动态创建PV。
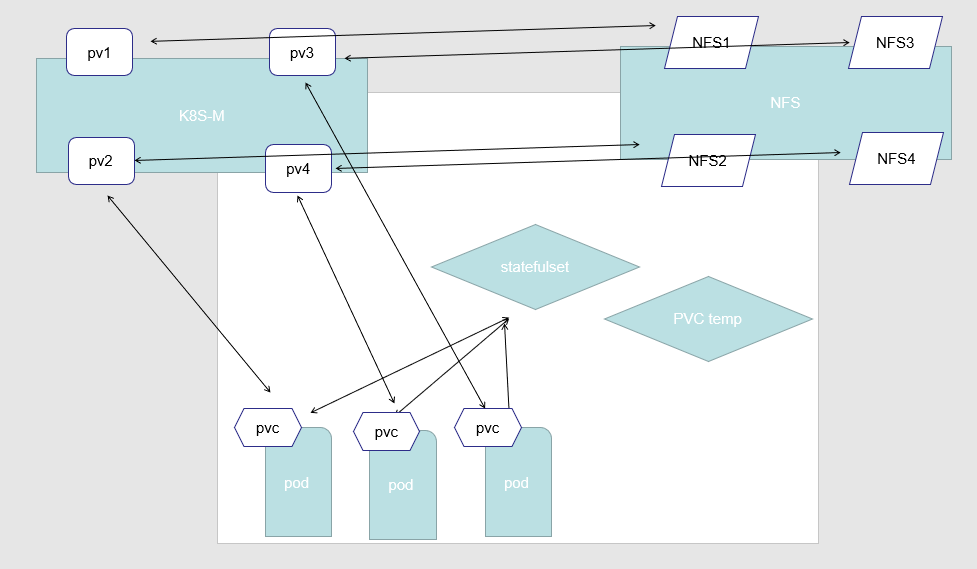
PersistentVolume(PV)
是由管理员设置的存储,它是群集的一部分。就像节点是集群中的资源一样,PV 也是集群中的资源。PV 是 Volume 之类的卷插件,但具有独立于使用 PV 的 Pod 的生命周期。此 API 对象包含存储实现的细节,即 NFS、iSCSI 或特定于云供应商的存储系统。
PersistentVolumeClaim(PVC)
是用户存储的请求。它与 Pod 相似。Pod 消耗节点资源,PVC 消耗 PV 资源。Pod 可以请求特定级别的资源(CPU 和内存)。声明可以请求特定的大小和访问模式(例如,可以以读/写一次或只读多次模式挂载)
静态 pv
集群管理员创建一些 PV。它们带有可供群集用户使用的实际存储的细节。它们存在于 Kubernetes API 中,可用于消费
动态 pv
当管理员创建的静态 PV 都不匹配用户的 PersistentVolumeClaim 时,集群可能会尝试动态地为 PVC 创建卷。此配置基于 StorageClasses:PVC 必须请求 [存储类],并且管理员必须创建并配置该类才能进行动态创建。声明该类为””可以有效地禁用其动态配置要启用基于存储级别的动态存储配置,集群管理员需要启用 API server 上的 DefaultStorageClass [准入控制器]。例如,通过确保 DefaultStorageClass 位于 API server 组件的 --admission-control 标志,使用逗号分隔的有序值列表中,可以完成此操作
StorageClass 对象的作用,其实就是创建 PV 的模板。
PV的属性。比如,存储类型、Volume的大小等等。- 创建这种
PV需要用到的存储插件。比如,Ceph等等。
动态 PV 工作的过程:
首先我们定义了一个 StorageClass。当用户创建好 Pod 以后,指定了 PVC,这个时候 Kubernetes 就会根据 StorageClass 中定义的 Provisioner 来调用对应的 plugin 来创建 PV。PV 创建成功后,跟 PVC 进行绑定,挂载到 Pod 中使用。1
2
3
4
5
6
7
8
9
10
11
12
13
14
15
16
17
18
19apiVersion: storage.k8s.io/v1
kind: StorageClass
metadata:
name: fast-rbd-sc
annotation:
storageclass.kubernetes.io/is-default-class: "true"
provisioner: kubernetes.io/rbd # 必填项,用来指定volume plugin来创建PV的物理资源,内置
parameters: # 一些参数
monitors: 10.16.153.105:6789
adminId: kube
adminSecretName: ceph-secret
adminSecretNamespace: kube-system
pool: kube
userId: kube
userSecretName: ceph-secret-user
userSecretNamespace: default
fsType: ext4
imageFormat: "2"
imageFeatures: "layering"
绑定
master 中的控制环路监视新的 PVC,寻找匹配的 PV(如果可能),并将它们绑定在一起。如果为新的 PVC 动态调配 PV,则该环路将始终将该 PV 绑定到 PVC。否则,用户总会得到他们所请求的存储,但是容量可能超出要求的数量。一旦 PV 和 PVC 绑定后,PersistentVolumeClaim 绑定是排他性的,不管它们是如何绑定的。 PVC 跟 PV 绑定是一对一的映射
1 | apiVersion: v1 |
持久化卷声明的保护PVC
保护的目的是确保由 pod 正在使用的 PVC 不会从系统中移除,因为如果被移除的话可能会导致数据丢失.当启用 PVC 保护 alpha 功能时,如果用户删除了一个 pod 正在使用的 PVC,则该 PVC 不会被立即删除。PVC 的删除将被推迟,直到 PVC 不再被任何 pod 使用
PV 访问模式
PersistentVolume可以以资源提供者支持的任何方式挂载到主机上。
ReadWriteOnce—— 该卷可以被单个节点以读/写模式挂载RWOReadOnlyMany—— 该卷可以被多个节点以只读模式挂载ROXReadWriteMany—— 该卷可以被多个节点以读/写模式挂载RWX
回收策略
Retain(保留)——手动回收Recycle(回收)——基本擦除(rm -rf /thevolume/*)Delete(删除)——关联的存储资产(例如 AWS EBS、GCE PD、Azure Disk 和 OpenStack Cinder 卷)将被删除当前
只有 NFS(已不支持) 和 HostPath 支持回收策略。AWS EBS、GCE PD、Azure Disk 和 Cinder 卷支持删除策略
状态
卷可以处于以下的某种状态
Pending: 表示目前该PV在后端存储系统中还没创建完成;Available: 一块空闲资源还没有被任何声明绑定Bound: 卷已经被声明绑定Released: 声明被删除,但是资源还未被集群重新声明Failed: 该卷的自动回收失败
命令行会显示绑定到 PV 的 PVC 的名称
对于 PVC 来说,也有如下三种状态:
Pending 表示还未绑定任何 PV
Bound 表示已经和某个 PV 进行了绑定
Lost 表示关联的 PV 失联
持久化演示说明 - NFS
- 安装 NFS 服务器
eg: 在 三个 节点上安装1
2
3
4
5
6
7yum install -y nfs-common nfs-utils rpcbind
mkdir /nfsdata
chmod 666 /nfsdata
chown nfsnobody /nfsdata
echo "/nfsdata *(rw,no_root_squash,no_all_squash,sync)" >> /etc/exports
systemctl start rpcbind
systemctl start nfs
k8s02,k8s03操作
测试 NFS 是否成功1
2
3
4
5
6
7
8
9
10
11
12
13
14
15
16
17[root@k8s02 ~]# showmount -e 192.168.43.101
Export list for 192.168.43.101:
/nfsdata *
[root@k8s02 ~]# mkdir /testnfs/
[root@k8s02 ~]# mount -t nfs 192.168.43.101:/nfsdata /testnfs/
[root@k8s02 ~]# df -h #节选
Filesystem Size Used Avail Use% Mounted on
192.168.43.101:/nfsdata 17G 3.9G 14G 23% /testnfs
$ umount /testnfs/
umount.nfs4: /testnfs: device is busy
$ cd ~
$ umount /testnfs/
$ rm -rf /testnfs/
- 部署 PV
1
2
3
4
5
6
7
8
9
10
11
12
13
14
15apiVersion: v1
kind: PersistentVolume
metadata:
name: pv0003
spec:
capacity:
storage: 5Gi
volumeMode: Filesystem
accessModes:
- ReadWriteOnce
persistentVolumeReclaimPolicy: Retain # 回收策略
storageClassName: nfs # 类名称 PV 和 PVC 的 storageClassName 字段必须一样
nfs:
path: /nfsdata
server: 192.168.43.101
eg:1
2
3
4
5[root@k8s01 ~]# kubectl apply -f pv-example.yaml
persistentvolume/pv0003 created
[root@k8s01 ~]# kubectl get pv
NAME CAPACITY ACCESS MODES RECLAIM POLICY STATUS CLAIM STORAGECLASS REASON AGE
pv0003 5Gi RWO Retain Available nfs 35s
- 创建服务并使用 PVC
一个典型、完整可用的 StatefulSet 通常由三个组件构成: Headless Service 、 StatefulSet 和 volumeClaimTemplate 。其中,Headless Service 用于为 Pod 资源标识符生成可解析的 DNS 资源记录,StatefulSet 用于管控 Pod 资源,volumeClaimTemplate 则基于静态或动态的 PV 供给方式为 Pod 资源提供专有且固定的存储。
StatefulSet-example.yaml1
2
3
4
5
6
7
8
9
10
11
12
13
14
15
16
17
18
19
20
21
22
23
24
25
26
27
28
29
30
31
32
33
34
35
36
37
38
39
40
41
42
43
44
45
46
47apiVersion: v1
kind: Service
metadata:
name: nginx
labels:
app: nginx
spec:
ports:
- port: 80
name: web
clusterIP: None
selector:
app: nginx
---
apiVersion: apps/v1
kind: StatefulSet # 使用 StatefulSet 必须先建立一个 无头服务
metadata:
name: web
spec:
selector:
matchLabels:
app: nginx
serviceName: "nginx"
replicas: 3
template:
metadata:
labels:
app: nginx
spec:
containers:
- name: nginx
image: nginx:1.7.9
ports:
- containerPort: 80
name: web
volumeMounts:
- name: www # 与下面对应
mountPath: /usr/share/nginx/html
volumeClaimTemplates:
- metadata:
name: www
spec:
accessModes: ["ReadWriteOnce"]
storageClassName: "nfs" # PV 和 PVC 的 storageClassName 字段必须一样
resources:
requests:
storage: 1Gi
因为只能绑定 1个 PV1
2
3
4
5
6
7
8
9
10
11
12
13
14[root@k8s01 ~]# kubectl apply -f StatefulSet-example.yaml
service/nginx created
statefulset.apps/web created
[root@k8s01 ~]# kubectl get pod # 有序部署 0,1,2 (0完成后才部署1)
NAME READY STATUS RESTARTS AGE
web-0 1/1 Running 0 12s
web-1 0/1 Pending 0 10s # 一直处于 Pending 状态
## 节选,发现绑定不了 PV
Events:
Type Reason Age From Message
---- ------ ---- ---- -------
Warning FailedScheduling 28s (x3 over 101s) default-scheduler running "VolumeBinding" filter plugin for pod "web-1": pod has unbound immediate PersistentVolumeClaims
pv-example-more.yaml1
2
3
4
5
6
7
8
9
10
11
12
13
14
15
16
17
18
19
20
21
22
23
24
25
26
27
28
29
30
31
32
33
34
35
36
37
38
39
40
41
42
43
44
45
46
47
48
49
50
51
52
53
54
55
56
57
58
59
60
61
62
63apiVersion: v1
kind: PersistentVolume
metadata:
name: pv01
spec:
capacity:
storage: 2Gi
volumeMode: Filesystem
accessModes:
- ReadWriteOnce
persistentVolumeReclaimPolicy: Retain # 回收策略
storageClassName: nfs # 类名称
nfs:
path: /nfsdata01
server: 192.168.43.101
---
apiVersion: v1
kind: PersistentVolume
metadata:
name: pv02
spec:
capacity:
storage: 1Gi
volumeMode: Filesystem
accessModes:
- ReadWriteOnce
persistentVolumeReclaimPolicy: Retain # 回收策略
storageClassName: test # 类名称
nfs:
path: /nfsdata02
server: 192.168.43.101
---
apiVersion: v1
kind: PersistentVolume
metadata:
name: pv03
spec:
capacity:
storage: 1Gi
volumeMode: Filesystem
accessModes:
- ReadWriteOnce
persistentVolumeReclaimPolicy: Retain # 回收策略
storageClassName: nfs # 类名称
nfs:
path: /nfsdata03
server: 192.168.43.101
---
apiVersion: v1
kind: PersistentVolume
metadata:
name: pv04
spec:
capacity:
storage: 1Gi
volumeMode: Filesystem
accessModes:
- ReadWriteOnce
persistentVolumeReclaimPolicy: Retain # 回收策略
storageClassName: nfs # 类名称
nfs:
path: /nfsdata04
server: 192.168.43.101
创建1
2
3
4
5
6
7
8
9
10
11
12
13
14
15
16
17
18
19
20
21
22
23
24
25
26
27[root@k8s01 ~]# mkdir /nfsdata{01,02,03,04}
root@k8s01 ~]# kubectl apply -f pv-example-more.yaml
persistentvolume/pv01 created
persistentvolume/pv02 created
persistentvolume/pv03 created
persistentvolume/pv04 created
[root@k8s01 ~]# chmod 666 /nfsdata{01,02,03,04}
[root@k8s01 ~]# chown nfsnobody /nfsdata{01,02,03,04}
[root@k8s01 ~]# kubectl describe pod web-0 # 报错 因为 没执行 echo "/nfsdata01 *(rw,no_root_squash,no_all_squash,sync)" >> /etc/exports
## systemctl restart rpcbind
## systemctl restart nfs
## 节选
Events:
Type Reason Age From Message
---- ------ ---- ---- -------
Mounting command: systemd-run
Mounting arguments: --description=Kubernetes transient mount for /var/lib/kubelet/pods/6c4be93c-fb32-4891-821e-817a7853c4c5/volumes/kubernetes.io~nfs/pv01 --scope -- mount -t nfs 192.168.43.101:/nfsdata01 /var/lib/kubelet/pods/6c4be93c-fb32-4891-821e-817a7853c4c5/volumes/kubernetes.io~nfs/pv01
Output: Running scope as unit run-51115.scope.
mount.nfs: access denied by server while mounting 192.168.43.101:/nfsdata01
Warning FailedMount 55s kubelet, k8s03 MountVolume.SetUp failed for volume "pv01" : mount failed: exit status 32
Mounting command: systemd-run
Mounting arguments: --description=Kubernetes transient mount for /var/lib/kubelet/pods/6c4be93c-fb32-4891-821e-817a7853c4c5/volumes/kubernetes.io~nfs/pv01 --scope -- mount -t nfs 192.168.43.101:/nfsdata01 /var/lib/kubelet/pods/6c4be93c-fb32-4891-821e-817a7853c4c5/volumes/kubernetes.io~nfs/pv01
Output: Running scope as unit run-51258.scope.
mount.nfs: access denied by server while mounting 192.168.43.101:/nfsdata01
Warning FailedScheduling 25s (x2 over 25s) default-scheduler running "VolumeBinding" filter plugin for pod "web-0": pod has unbound immediate PersistentVolumeClaims
Normal Scheduled 23s default-scheduler Successfully assigned default/web-0 to k8s03
查看信息1
2
3
4
5
6
7
8
9
10
11
12
13
14
15
16[root@k8s01 ~]# kubectl get pod # 有序部署 0,1,2
NAME READY STATUS RESTARTS AGE
web-0 1/1 Running 0 10s
web-1 1/1 Running 0 7s
web-2 1/1 Running 0 3s
[root@k8s01 ~]# kubectl get pvc
NAME STATUS VOLUME CAPACITY ACCESS MODES STORAGECLASS AGE
www-web-0 Bound pv01 2Gi RWO nfs 65s
www-web-1 Bound pv03 2Gi RWO nfs 62s
www-web-2 Bound pv04 2Gi RWO nfs 58s
[root@k8s01 ~]# kubectl get pv
NAME CAPACITY ACCESS MODES RECLAIM POLICY STATUS CLAIM STORAGECLASS REASON AGE
pv01 2Gi RWO Retain Bound default/www-web-0 nfs 3m58s
pv02 2Gi RWO Retain Available test 3m58s
pv03 2Gi RWO Retain Bound default/www-web-1 nfs 3m58s
pv04 2Gi RWO Retain Bound default/www-web-2 nfs 3m58s
删除顺序1
2
3
4
5
6
7
8
9
10
11
12
13
14
15
16
17[root@k8s01 ~]# kubectl get pod -w # 有序删除 2,1,0
NAME READY STATUS RESTARTS AGE
web-0 1/1 Running 0 1m
web-1 1/1 Running 0 1m
web-2 1/1 Running 0 48s
web-2 1/1 Terminating 0 54s
web-2 0/1 Terminating 0 57s
web-2 0/1 Terminating 0 1m
web-2 0/1 Terminating 0 1m
web-1 1/1 Terminating 0 1m
web-1 0/1 Terminating 0 1m
web-1 0/1 Terminating 0 1m
web-1 0/1 Terminating 0 1m
web-0 1/1 Terminating 0 1m
web-0 0/1 Terminating 0 1m
web-0 0/1 Terminating 0 1m
web-0 0/1 Terminating 0 1m
释放 pv1
2
3
4
5
6
7
8
9
10
11
12
13
14
15
16
17
18
19
20
21
22
23
24
25
26
27
28
29
30
31[root@k8s01 ~]# kubectl delete pvc www-web-0 www-web-1 www-web-2
persistentvolumeclaim "www-web-0" deleted
persistentvolumeclaim "www-web-1" deleted
persistentvolumeclaim "www-web-2" deleted
[root@k8s01 ~]# kubectl get pv
NAME CAPACITY ACCESS MODES RECLAIM POLICY STATUS CLAIM STORAGECLASS REASON AGE
pv01 2Gi RWO Retain Bound default/www-web-0 nfs 11m
pv02 2Gi RWO Retain Available test 11m
pv03 2Gi RWO Retain Bound default/www-web-1 nfs 11m
pv04 2Gi RWO Retain Bound default/www-web-2 nfs 11m
[root@k8s01 ~]# kubectl edit pv pv01
## 删除以下字段解除绑定
claimRef:
apiVersion: v1
kind: PersistentVolumeClaimWWW
name: www-web-0
namespace: default
resourceVersion: "322074"
uid: 9cb4adcc-01ba-4a4f-9bf0-205bcb3a9b9e
persistentvolume/pv01 edited
[root@k8s01 ~]# kubectl get pv
NAME CAPACITY ACCESS MODES RECLAIM POLICY STATUS CLAIM STORAGECLASS REASON AGE
pv01 2Gi RWO Retain Available nfs 12m
pv02 2Gi RWO Retain Available test 12m
pv03 2Gi RWO Retain Bound default/www-web-1 nfs 12m
pv04 2Gi RWO Retain Bound default/www-web-2 nfs 12m
使用本地目录1
2
3
4
5
6
7
8
9
10
11
12
13
14
15
16
17
18
19
20
21
22
23
24
25
26
27apiVersion: v1
kind: PersistentVolumeClaim
metadata:
name: www-web-0
namespace: default
spec:
accessModes:
- ReadWriteOnce
resources:
requests:
storage: 10Gi
volumeMode: Filesystem
---
apiVersion: v1
kind: PersistentVolume
metadata:
name: pv-0
spec:
accessModes:
- ReadWriteOnce
capacity:
storage: 1Gi
hostPath:
path: /var/lib/localpath/pv-0
type: DirectoryOrCreate
persistentVolumeReclaimPolicy: Retain
volumeMode: Filesystem
关于 StatefulSet
- 匹配
Pod name( 网络标识 ) 的模式为:$(statefulset名称)-$(序号),比如上面的示例:web-0,web-1,web-2 StatefulSet为每个Pod副本创建了一个DNS域名,这个域名的格式为:$(podname).(headless servername),也就意味着服务间是通过Pod域名来通信而非 Pod IP,因为当Pod所在Node发生故障时,Pod会被飘移到其它Node上,Pod IP会发生变化,但是Pod域名不会有变化StatefulSet使用Headless服务来控制Pod的域名,这个域名的FQDN为:$(servicename).$(namespace).svc.cluster.local,其中,cluster.local指的是集群的域名- 根据
volumeClaimTemplates,为每个Pod创建一个pvc,pvc的命名规则匹配模式:(volumeClaimTemplates.name)-(pod_name),比如上面的volumeMounts.name=www,Podname=web-[0-2],因此创建出来的PVC是www-web-0、www-web-1、www-web-2 - 删除
Pod不会删除其pvc,手动删除pvc将自动释放pv
1 | [root@k8s01 /]# kubectl get pod -o wide |
1 | [root@k8s01 /]# kubectl exec web-2 -it -- /bin/bash |
1 | [root@k8s01 /]# kubectl get pod -o wide --all-namespaces |
Statefulset的启停顺序
- 有序部署:部署StatefulSet时,如果有多个Pod副本,它们会被顺序地创建(从0到N-1)并且,在下一个Pod运行之前所有之前的Pod必须都是Running和Ready状态。
- 有序删除:当Pod被删除时,它们被终止的顺序是从N-1到0。
- 有序扩展:当对Pod执行扩展操作时,与部署一样,它前面的Pod必须都处于Running和Ready状态。
StatefulSet使用场景
- 稳定的持久化存储,即
Pod重新调度后还是能访问到相同的持久化数据,基于PVC来实现。 - 稳定的网络标识符,即
Pod重新调度后其PodName和HostName不变。 - 有序部署,有序扩展,基于
init containers来实现。 - 有序收缩。
动态创建 PV rook 示例
rook示例
storageclass.yaml1
2
3
4
5
6
7
8
9
10
11
12
13
14
15
16
17
18
19
20
21
22
23
24
25
26
27
28
29
30
31
32
33
34
35
36
37
38
39
40
41
42
43
44
45
46
47
48
49
50
51
52
53
54
55
56
57
58
59
60
61
62
63# 定义一个块存储池
apiVersion: ceph.rook.io/v1
kind: CephBlockPool
metadata:
name: replicapool
namespace: rook-ceph
spec:
# 每个数据副本必须跨越不同的故障域分布,如果设置为host,则保证每个副本在不同机器上
failureDomain: host
# 副本数量
replicated:
size: 3
# Disallow setting pool with replica 1, this could lead to data loss without recovery.
# Make sure you're *ABSOLUTELY CERTAIN* that is what you want
requireSafeReplicaSize: true
# gives a hint (%) to Ceph in terms of expected consumption of the total cluster capacity of a given pool
# for more info: https://docs.ceph.com/docs/master/rados/operations/placement-groups/#specifying-expected-pool-size
#targetSizeRatio: .5
---
# 定义一个StorageClass
apiVersion: storage.k8s.io/v1
kind: StorageClass
metadata:
name: rook-ceph-block
# 该SC的Provisioner标识,rook-ceph前缀即当前命名空间
provisioner: rook-ceph.rbd.csi.ceph.com
parameters:
# clusterID 就是集群所在的命名空间名
# If you change this namespace, also change the namespace below where the secret namespaces are defined
clusterID: rook-ceph
# If you want to use erasure coded pool with RBD, you need to create
# two pools. one erasure coded and one replicated.
# You need to specify the replicated pool here in the `pool` parameter, it is
# used for the metadata of the images.
# The erasure coded pool must be set as the `dataPool` parameter below.
#dataPool: ec-data-pool
# RBD镜像在哪个池中创建
pool: replicapool
# RBD image format. Defaults to "2".
imageFormat: "2"
# 指定image特性,CSI RBD目前仅仅支持layering
imageFeatures: layering
# Ceph admin 管理凭证配置,由operator 自动生成
# in the same namespace as the cluster.
csi.storage.k8s.io/provisioner-secret-name: rook-csi-rbd-provisioner
csi.storage.k8s.io/provisioner-secret-namespace: rook-ceph
csi.storage.k8s.io/controller-expand-secret-name: rook-csi-rbd-provisioner
csi.storage.k8s.io/controller-expand-secret-namespace: rook-ceph
csi.storage.k8s.io/node-stage-secret-name: rook-csi-rbd-node
csi.storage.k8s.io/node-stage-secret-namespace: rook-ceph
# 卷的文件系统类型,默认ext4,不建议xfs,因为存在潜在的死锁问题(超融合设置下卷被挂载到相同节点作为OSD时)
csi.storage.k8s.io/fstype: ext4
# uncomment the following to use rbd-nbd as mounter on supported nodes
# **IMPORTANT**: If you are using rbd-nbd as the mounter, during upgrade you will be hit a ceph-csi
# issue that causes the mount to be disconnected. You will need to follow special upgrade steps
# to restart your application pods. Therefore, this option is not recommended.
#mounter: rbd-nbd
allowVolumeExpansion: true
reclaimPolicy: Delete
file
filesystem.yaml1
2
3
4
5
6
7
8
9
10
11
12
13
14
15
16
17
18
19
20
21
22
23
24
25
26
27
28
29
30
31
32
33
34
35
36
37
38
39
40
41
42
43
44
45
46apiVersion: ceph.rook.io/v1
kind: CephFilesystem
metadata:
name: test
namespace: rook-ceph
spec:
# The metadata pool spec
metadataPool:
replicated:
# Increase the replication size if you have more than one osd
size: 3
# The list of data pool specs
dataPools:
- failureDomain: osd
replicated:
size: 3
# The metadata service (mds) configuration
metadataServer:
# The number of active MDS instances
activeCount: 1
# Whether each active MDS instance will have an active standby with a warm metadata cache for faster failover.
# If false, standbys will be available, but will not have a warm cache.
activeStandby: true
# The affinity rules to apply to the mds deployment
placement:
# nodeAffinity:
# requiredDuringSchedulingIgnoredDuringExecution:
# nodeSelectorTerms:
# - matchExpressions:
# - key: role
# operator: In
# values:
# - mds-node
# tolerations:
# - key: mds-node
# operator: Exists
# podAffinity:
# podAntiAffinity:
resources:
# The requests and limits set here, allow the filesystem MDS Pod(s) to use half of one CPU core and 1 gigabyte of memory
# limits:
# cpu: "500m"
# memory: "1024Mi"
# requests:
# cpu: "500m"
# memory: "1024Mi"
查看1
2
3
4
5
6
7
8
[root@test173 ~]# kubectl get storageclasses.storage.k8s.io
NAME              PROVISIONER          RECLAIMPOLICY   VOLUMEBINDINGMODE   ALLOWVOLUMEEXPANSION   AGE
rook-ceph-block   ceph.rook.io/block   Delete          Immediate           false                  113m

[root@test173 ~]#  kubectl get cephfilesystems.ceph.rook.io --all-namespaces
NAMESPACE   NAME      AGE
rook-ceph   test       13d
sts
sts.yaml1
2
3
4
5
6
7
8
9
10
11
12
13
14
15
16
17
18
19
20
21
22
23
24
25
26
27
28
29
30
31
32
33
34
35
36
37
38
39
40
41
42
43
44
45
46
47
48apiVersion: v1
kind: Service
metadata:
name: nginx
labels:
app: nginx
spec:
ports:
- port: 80
name: web
clusterIP: None
selector:
app: nginx
---
apiVersion: apps/v1
kind: StatefulSet # 使用 StatefulSet 必须先建立一个 无头服务
metadata:
name: web
spec:
selector:
matchLabels:
app: nginx
serviceName: "nginx"
replicas: 3
template:
metadata:
labels:
app: nginx
spec:
containers:
- name: nginx
image: nginx
ports:
- containerPort: 80
name: web
volumeMounts:
- name: www # 与下面对应
mountPath: /usr/share/nginx/html
volumeClaimTemplates:
- metadata:
name: www
spec:
accessModes:
- ReadWriteOnce
resources:
requests:
storage: 100Gi
storageClassName: rook-ceph-block
验证
1 | [root@test173 ceph]# kubectl get pvc |
pod
测试动态创建 PV
test_pv.yaml1
2
3
4
5
6
7
8
9
10
11
12
13
14
15
16
17
18
19
20
21
22
23
24
25
26
27
28
29
30
31
32apiVersion: v1
kind: PersistentVolumeClaim
metadata:
name: pod-pvc
spec:
accessModes:
- ReadWriteOnce
storageClassName: rook-ceph-block # PVC 所要使用的 StorageClass
resources:
requests:
storage: 30Gi
---
apiVersion: v1
kind: Pod
metadata:
name: pvtest
labels:
role: nginx
spec:
containers:
- name: web
image: nginx
ports:
- name: web
containerPort: 80
volumeMounts:
- name: www
mountPath: "/usr/share/nginx/html"
volumes:
- name: www
persistentVolumeClaim:
claimName: pod-pvc
验证
1 | [root@test173 ceph]# kubectl get pv |grep pod-pvc |
测试删除, 需要手动释放 pv
eg:
删除 sts, pvc 后
1 | root@test173 ceph]# kubectl get pv |grep www |
无需再手动修改 pv ,立刻自动删除
1 | [root@test173 ceph]# kubectl get pv|grep www |
遇到的问题
- pvc 已被其他 node 挂载
1 | Warning FailedAttachVolume 32m attachdetach-controller Multi-Attach error for volume "pvc-eee48fd5-304f-49ef-be4b-420f09f43d6f" Volume is already exclusively attached to one node and can't be attached to another |
当前使用的是 ceph rbd
查看 pvc 和 pv ,使用的是 cephrbd-data/csi-vol-0a14b8c5-d2d2-4e10-b64f-8264df4c6ef4
查看状态1
2
3 rbd status cephrbd-data/csi-vol-0a14b8c5-d2d2-4e10-b64f-8264df4c6ef4 --id admin --keyfile /etc/ceph/gcp-rbd.keyring
Watchers:
watcher=192.168.1.41:0/3755306177 client.406873 cookie=18446462598732840961
发现 被 192.168.1.41 占用, 去41上查看
1 | root@k8s-41:~# rbd showmapped |
当前节点的 /dev/rbd1
1 | mount | grep /dev/rbd1 |