请结合 k8s 简介与安装 操作
准备条件
VIP 192.168.43.100
| 主机名 | IP | 角色 |
| —— | ———— | —— |
| k8s01 | 192.168.43.101 | master |
| k8s02 | 192.168.43.102 | worker |
| k8s03 | 192.168.43.103 | worker |
| k8s04 | 192.168.43.104 | master |
| k8s05 | 192.168.43.105 | master |
前置条件与单 master 相同
所有节点执行1
2
3
4
5
6
7
8
9
10
11
12
13
14
15
16
17
18
19
20
21
22
23
24
25
26
27
28
29
30
31
32
33
34
35
36
37
38
39
40
41
42
43
44
45
46
47
48
49
50
51
52
53
54
55
56
57
58
59
60
61
62
63
64# 根据规划设置主机名
hostnamectl set-hostname <hostname>
# 在master添加hosts
cat >> /etc/hosts << EOF
192.168.43.100 k8s-vip master.k8s.io
192.168.43.101 k8s01 k8s01.k8s.io
192.168.43.102 k8s02 k8s02.k8s.io
192.168.43.103 k8s03 k8s03.k8s.io
192.168.43.104 k8s04 k8s04.k8s.io
192.168.43.105 k8s05 k8s05.k8s.io
EOF
## 所有节点执行以下内容
#!/bin/sh
#关闭防火墙
systemctl disable --now firewalld
setenforce 0
sed -i 's/enforcing/disabled/' /etc/selinux/config
#关闭swap分区
swapoff -a
sed -i.bak 's/^.*centos-swap/#&/g' /etc/fstab
#优化系统
cat > /etc/sysctl.d/k8s.conf << EOF
net.ipv4.ip_forward = 1
net.bridge.bridge-nf-call-iptables = 1
net.bridge.bridge-nf-call-ip6tables = 1
fs.may_detach_mounts = 1
vm.overcommit_memory=1
vm.panic_on_oom=0
fs.inotify.max_user_watches=89100
fs.file-max=52706963
fs.nr_open=52706963
net.ipv4.tcp_keepalive_time = 600
net.ipv4.tcp.keepaliv.probes = 3
net.ipv4.tcp_keepalive_intvl = 15
net.ipv4.tcp.max_tw_buckets = 36000
net.ipv4.tcp_tw_reuse = 1
net.ipv4.tcp.max_orphans = 327680
net.ipv4.tcp_orphan_retries = 3
net.ipv4.tcp_syncookies = 1
net.ipv4.tcp_max_syn_backlog = 16384
net.ipv4.ip_conntrack_max = 65536
net.ipv4.tcp_max_syn_backlog = 16384
net.ipv4.top_timestamps = 0
net.core.somaxconn = 16384
EOF
#立即生效
sysctl --system
#配置阿里云的base和epel源
mv /etc/yum.repos.d/* /tmp
curl -o /etc/yum.repos.d/CentOS-Base.repo https://mirrors.aliyun.com/repo/Centos-7.repo
curl -o /etc/yum.repos.d/epel.repo http://mirrors.aliyun.com/repo/epel-7.repo
#安装dnf工具
yum install dnf -y
dnf makecache
#安装ntpdate工具
dnf install ntpdate -y
#同步阿里云时间
ln -sf /usr/share/zoneinfo/Asia/Shanghai /etc/localtime
ntpdate ntp.aliyun.com
安装
1. Haproxy+Keepalived配置高可用VIP (推荐使用 nginx + keepalived)
在 三个 master 节点安装1
dnf install -y keepalived haproxy
2. 配置 Keepalived 服务
k8s011
2
3
4
5
6
7
8
9
10
11
12
13
14
15
16
17
18
19
20
21
22
23
24
25
26
27
28
29
30
31
32
33
34cat > /etc/keepalived/keepalived.conf <<EOF
! Configuration File for keepalived
global_defs {
router_id k8s
}
vrrp_script check_haproxy {
script "killall -0 haproxy"
interval 3
weight -2
fall 10
rise 2
}
vrrp_instance VI_1 {
state MASTER # 主节点
interface ens33 # 当前用的 ens33 网卡
virtual_router_id 51
priority 100 # 优先级配置 k8s01 100 k8s04 99 k8s05 98
advert_int 2
authentication {
auth_type PASS
auth_pass K8SHA_KA_AUTH
}
virtual_ipaddress { # VIP
192.168.43.100
}
track_script {
check_kubernetes # 集群检查脚本
}
}
EOF
k8s04 和 k8s05
1 | cat > /etc/keepalived/keepalived.conf <<EOF |
3. 配置健康检测脚本
/etc/keepalived/check_kubernetes.sh1
2
3
4
5
6
7
8
9
10
11
12
13
14
15
16
17
18
19
20
21
22
23
24cat > /etc/keepalived/check_kubernetes.sh <<EOF
#!/bin/bash
function chech_kubernetes() {
for ((i=0;i<5;i++));do
apiserver_pid_id=$(pgrep kube-apiserver)
if [[ ! -z $apiserver_pid_id ]];then
return
else
sleep 2
fi
apiserver_pid_id=0
done
}
# 1:running 0:stopped
check_kubernetes
if [[ $apiserver_pid_id -eq 0 ]];then
/usr/bin/systemctl stop keepalived
exit 1
else
exit 0
fi
EOF
添加 x 权限1
chmod +x /etc/keepalived/check_kubernetes.sh
4. 配置 haproxy (推荐使用 nginx)
三台 master 节点的配置均相同,配置中声明了后端代理的三个 master 节点服务器,指定了 haproxy 运行的端口为 16443 等,因此 16443 端口为集群的入口/etc/haproxy/haproxy.cfg
1 | cat > /etc/haproxy/haproxy.cfg << EOF |
5. 设置开机启动并检查是否正常
1 | ~]# systemctl enable --now keepalived haproxy |
6. 修改初始化文件
~]# kubeadm config print init-defaults > kubeadm-init.yaml # 需要修改
修改后如下1
2
3
4
5
6
7
8
9
10
11
12
13
14
15
16
17
18
19
20
21
22
23
24
25
26
27
28
29
30
31
32
33
34
35
36
37
38
39
40
41
42
43
44
45
46
47
48
49
50
51
52
53
54
55
56
57apiVersion: kubeadm.k8s.io/v1beta2
bootstrapTokens:
- groups:
- system:bootstrappers:kubeadm:default-node-token
token: abcdef.0123456789abcdef
ttl: 24h0m0s
usages:
- signing
- authentication
kind: InitConfiguration
localAPIEndpoint:
advertiseAddress: 192.168.43.101 # 本地节点 ip
bindPort: 6443
nodeRegistration:
criSocket: /var/run/dockershim.sock
name: k8s01
taints:
- effect: NoSchedule
key: node-role.kubernetes.io/master
---
apiServer:
timeoutForControlPlane: 4m0s
certSANs:
- k8s01
- k8s04
- k8s05
- master.k8s.io
- 192.168.43.100 # VIP
- 192.168.43.101
- 192.168.43.104
- 192.168.43.105
- 127.0.0.1
apiVersion: kubeadm.k8s.io/v1beta2
certificatesDir: /etc/kubernetes/pki
clusterName: kubernetes
controlPlaneEndpoint: "192.168.43.100:16443" # 填 VIP 及对应 PORT
controllerManager: {}
dns:
type: CoreDNS
etcd:
local:
dataDir: /var/lib/etcd
imageRepository: registry.aliyuncs.com/google_containers
kind: ClusterConfiguration
kubernetesVersion: v1.18.0
networking:
dnsDomain: cluster.local
serviceSubnet: 10.96.0.0/12
podSubnet: 10.244.0.0/16 # 添加pod网段
scheduler: {}
---
apiVersion: kubeproxy.config.k8s.io/v1alpha1
kind: KubeProxyConfiguration
mode: ipvs
ipvs:
excludeCIDRs:
- 10.103.97.2/32
7 在master1节点执行
1 | $ kubeadm init --config kubeadm_init.yaml --upload-certs |
按照提示配置环境变量,使用 kubectl 工具:
1 | mkdir -p $HOME/.kube |
8. 安装集群网络
从官方地址获取到 calico 的 yaml ,在 k8s01上执行
1 | [root@k8s01 ~]# kubectl create -f calico.yaml |
9. 其他节点加入集群
9.1 复制密钥及相关文件(测试后续版本不需要复制文件的过程)
从 k8s01 复制密钥及相关文件到 k8s04 , k8s05
1 | ssh [email protected] mkdir -p /etc/kubernetes/pki/etcd |
9.2 其他 master 加入集群
执行在 k8s01 上 init 后输出的 join 命令,需要带上参数 --control-plane 表示把 master 控制节点加入集群
1 | kubeadm join master.k8s.io:16443 --token abcdef.0123456789abcdef \ |
9.3 加入Kubernetes Node
向集群添加新 worker 节点,执行在 kubeadm init 输出的 kubeadm join 命令:
1 | kubeadm join master.k8s.io:16443 --token abcdef.0123456789abcdef \ |
检查状态
1 | [root@k8s01 ~]# kubectl get node |
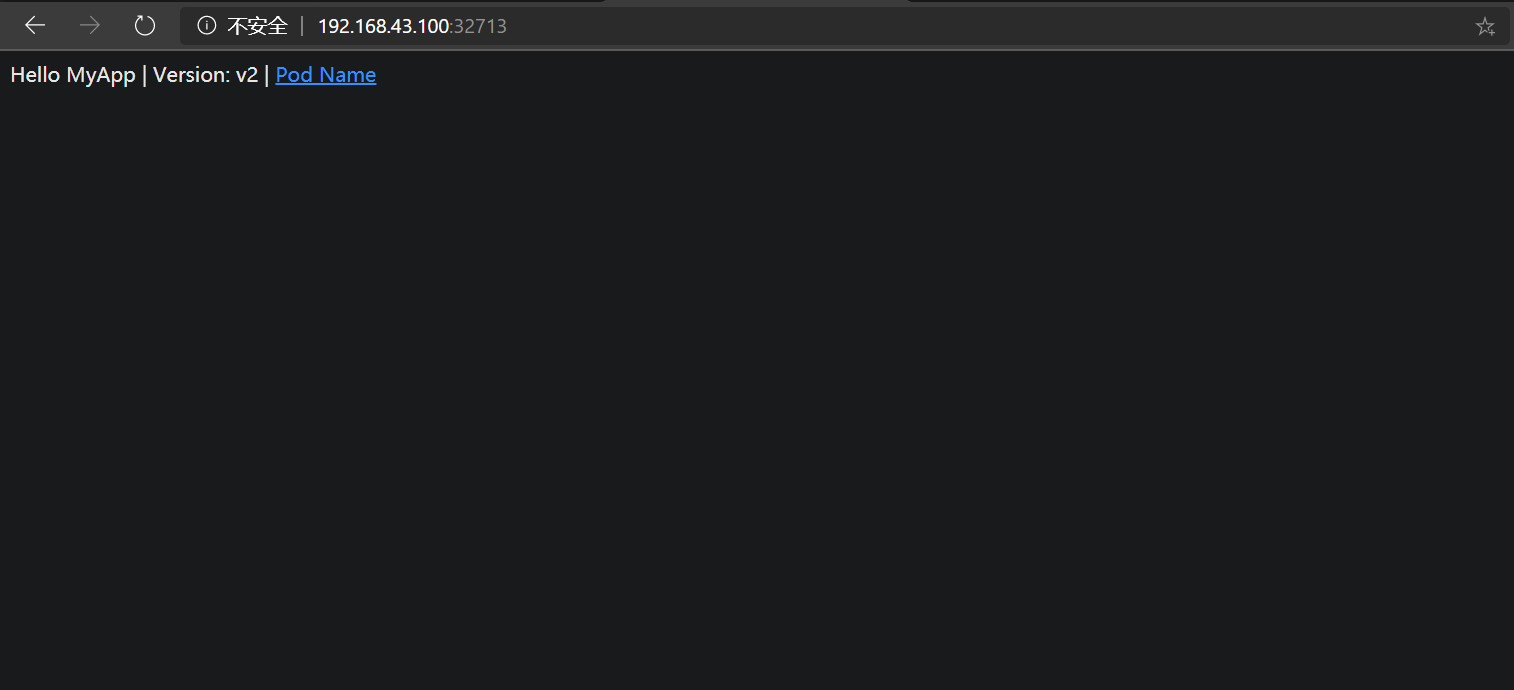
10. 测试kubernetes集群
在 Kubernetes 集群中创建一个pod,验证是否正常运行:
1 | [root@k8s01 ~]# kubectl create deployment nginx --image=imwl/myapp |
访问地址:http://192.168.43.100:32713